Popcorn ceilings had a moment. Builders liked them because they hid imperfections, sprayed on fast, and softened acoustics in echo-prone rooms. Decades later, those bumpy ceilings feel dated, collect dust, and complicate everything from lighting upgrades to resale. Removing popcorn texture is one of those projects that looks cosmetic on the surface, yet it changes how a home feels and functions. The difference is immediate: cleaner lines, brighter rooms, and a ceiling that stops stealing attention from the rest of your design.
This is a deep dive into why popcorn ceiling removal makes sense in modern homes, what to expect from the process, how to think about cost and risk, and details you only learn after doing hundreds of rooms.
Why popcorn texture lingers, and why it should go
Textured ceilings solved real problems in mid-century and late 20th century construction. They covered seam lines, nail pops, and waves in framing. A sprayed acoustic texture also absorbed sound in living rooms with hard floors. These benefits still matter, but we now have better answers: recessed-screw fastening, setting-type compounds, skim-coating methods, resilient channel, and sound-deadening insulation.
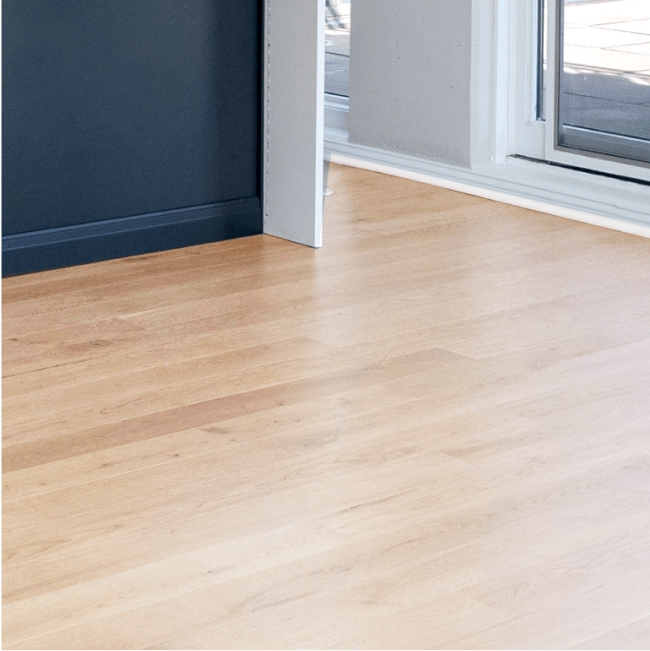
The liabilities of textured ceilings grow with time. Peaks catch dust and cigarette film, which gray out white paint and cast shadows that make rooms feel low. The texture complicates any change you want to make, from swapping a flush-mount fixture to laying out a coffered ceiling. If your style leans modern, transitional, Scandinavian, Japandi, or clean traditional, the ceiling becomes an outlier the moment you update the rest of the room.
Health and safety considerations, especially in pre-1980 homes
The first question any responsible contractor asks is the age of the home. Some popcorn compounds applied before the late 1970s can contain asbestos. Not all do, and plenty of homes built into the mid 80s have asbestos-free textures. The only way to know is a lab test. A small sample, wet-scraped and sealed, goes to an accredited lab. Results often come back within 1 to 3 business days. If asbestos is present, you are in a different regulatory lane. Removal must be handled by licensed abatement professionals under negative pressure containment, with air monitoring and proper disposal.
Even without asbestos, silica dust is harmful, and older paint layers can contain lead. A smooth job uses wet methods to control dust, HEPA filtration, and proper PPE. When a homeowner tries dry scraping without containment, that fine dust settles everywhere. It infiltrates cabinet hinges, HVAC returns, and fabric, which creates days of cleanup and lingering air quality issues.
A clear improvement in light and space
If you have ever painted a heavily textured ceiling, you know the roller trick of going north-south and then east-west. Despite your best effort, the ridges create micro-shadows. In practical terms, a popcorn ceiling can drop perceived brightness by 10 to 20 percent, depending on the height of peaks and your light source. Flatten that plane, and it reflects light cleanly. Trim lines sharpen. Wall color reads more true. In kitchens and bathrooms, where light is the most valuable design tool, this shift is dramatic.
We have seen eight-foot rooms feel almost an inch taller after removal and skim coating. That sounds like a stretch until you watch a sunbeam move across a flat, eggshell-finished ceiling and you no longer see the fuzziness that texture brings. If you are choosing between light and dark hardwood floors or planning a full interior painting project, a smooth ceiling makes every other finish look more expensive.
Real-world cost ranges and what affects them
Homeowners often ask for a number per square foot. The honest answer is a range. For asbestos-free popcorn, scraped and refinished to a paint-ready surface, a project can land between 2 to 5 dollars per square foot for accessible, open spaces. Smaller rooms, heavy texture, or ceilings that fail after scraping due to poor board joints can push costs higher. Include protection, repairs, materials, and two coats of quality ceiling paint in your estimate and the all-in number can sit in the 3 to 7 dollars per square foot band in many markets.
Complex spaces drive cost. Cathedral ceilings need scaffolding. Crown molding adds hand work at the edges. Kitchens with recessed lighting require careful masking around trim kits, and bathrooms add moisture barriers that complicate adhesion. If testing confirms asbestos, the scope changes entirely, and licensed abatement pricing is in its own category, often several times higher, with compliance costs built in.
Think of the budget the way you would approach The Cost of Painting a House in Chicago: prep sets the pace, not just the paint. The same rule holds overhead.
The removal process, from protection to paint
There are a few viable paths. Scrape and skim is the most common if the texture is unpainted or thinly painted. Where heavy paint has sealed the peaks, a bonding primer and skim coat is often faster and cleaner than aggressive scraping. In rare cases where the substrate is poor or the ceiling has many patches, overlay with quarter-inch drywall and finish those seams to Level 4 or 5. Each method hinges on the condition of the existing surface and the desired finish.
A clean, repeatable workflow looks like this:
- Room protection and containment: remove fixtures, mask walls, drape floors, seal supply and return vents, and set up negative air with a HEPA unit if feasible. Good protection saves time later. Wet scrape or bond and skim: mist with a pump sprayer for unpainted texture, test scrape, and proceed in manageable sections. For painted texture, prime with a high-adhesion bonding primer, then skim with setting-type compound. Skim coating and sanding: apply one to three passes of compound depending on the profile. Use a dust-extracting sander with a HEPA vacuum to keep the air clear. Prime and paint: use a drywall primer to equalize porosity, then a high-quality ceiling paint. Flat or matte hides minor telegraphing; eggshell reflects more light in kitchens and baths but requires a cleaner finish.
That four-step sequence compresses a lot of judgment. The choices of compound (hot mud for build, lightweight for finish), the trowel pressure that avoids chatter lines, and the patience to re-spot nail pops after the first coat all separate a serviceable ceiling from a great one.
What we have learned on site with Revive 360 Renovations
On a townhouse project last spring, the owners wanted to modernize a low, eight-foot main floor with a small kitchen and an open living area. They had already chosen new cabinet doors after reading Should You Replace Just Your Cabinet Doors? Here's What to Know, and they planned to paint the walls a soft neutral to improve resale. The popcorn only existed on the main level, roughly 850 square feet.
Our team at Revive 360 Renovations tested the texture, confirmed it was asbestos-free, and opted for a hybrid method. In the living area, the texture was thin and scraped well. In the kitchen, multiple paint layers sealed the peaks, so we switched to bonding primer and skim coats. We used a Festool Planex with HEPA extraction to keep dust in check and ran a temporary negative air setup to maintain air quality. The whole job took five days, including drying time, and the owners told us the space felt taller, brighter, and cleaner. Their under-cabinet lights finally matched the rest of the room’s lighting instead of fighting with shadows.
That job also reminded us of a small but important step: re-cutting the ceiling line above crown or where the wall and ceiling meet. After texture removal, the line you thought was straight often reveals waves in the old mud. We tape a laser, skim the ceiling edge, and then pull a crisp line with caulk and fine sanding blocks. It is fussy work, but it separates a DIY look from a professional finish.
Design flexibility unlocked by a smooth ceiling
Once the texture is gone, you can properly lay out recessed lighting, tracks, or slim-profile surface fixtures without worrying about shadow halos. If you are planning Kitchen Lighting Design: How to Brighten Your Cooking Space, a true flat plane lets beam spreads perform as designed. It also opens the door to features like simple, single-step crown or modern shadow lines, both of which look awkward on a sprayed surface.
In bathrooms, where you might be weighing Walk-In Shower vs. Bathtub: Which Is Right for Your Chicago Home?, a smooth, moisture-resistant ceiling finish cooperates with exhaust fans and avoids the lint-trapping effect that dusty texture creates. For powder rooms where you want graphic wallpaper or Venetian Plaster, a refined ceiling prevents the top of the room from dragging the design down.
Flat ceilings and indoor air quality
Dust behavior changes in a home over time. Textured ceilings work like a giant lint trap. Every footfall upstairs puffs a bit of air, and those peaks catch airborne particles. Households with pets or heavy textile use notice it more. Smooth ceilings still need cleaning, but they do not hoard dust the same way. If https://www.reviverenovations.com/ you are managing allergies or just trying to keep a white ceiling actually white, the smooth surface holds the line with less effort.
Ventilation matters too. Bathroom Ventilation: Why It Matters and How to Improve It connects directly to ceiling surfaces. A flat, sealed finish resists moisture better when paired with the right primer and paint. Add a properly ducted fan and you cut down condensation that discolors textured surfaces and weakens their bond.
The resale conversation
Real estate agents in many markets now call out popcorn removal in listing descriptions. It is a shorthand for a home that has been updated with care. Buyers shopping at a given price point often prefer to avoid disruption after closing. When they see popcorn, they mentally add both cost and hassle. Removing it before you list does not guarantee a higher sale price, but it widens the pool of interested buyers and shortens negotiation around cosmetic credits.
If you are considering The Best Neutral Paint Colors for Home Resale or looking at Budget-Friendly Kitchen Updates That Make a Big Impact, flattening ceilings belongs in the same conversation. It pairs well with cabinet painting, new hardware, and updated lighting, all of which benefit from a clean, light-reflective plane above.
When scraping is not the best path
A handful of scenarios argue for overlay or selective replacement. If the ceiling has significant cracking from truss uplift or past water damage, scraping texture just reveals structural movement you will need to address. Overlaying with quarter-inch drywall lets you decouple the finished surface from the existing problems, then finish seams to a Level 4. In basements with low headroom, overlay must be weighed against the loss of height. In rooms with elaborate crown or built-ins, overlay means more carpentry and often higher cost.
We also see clients who want intentional texture, just not popcorn. A controlled, tight skip-trowel or subtle plaster finish can deliver movement without the dust-catching peaks. That is a design choice, and it should be executed by someone who knows how to keep the pattern consistent and the plane level. The key is intentionality, not defaulting to a sprayed solution that was used to save time forty years ago.
How Revive 360 Renovations stages the work to minimize disruption
Few homeowners can vacate for a week. On multi-room projects, Revive 360 Renovations sequences work zone by zone, maintaining livable spaces and a predictable daily routine. We start with the furthest room, complete the cycle through paint, then shift containment forward. We coordinate with HVAC schedules to keep returns covered and filters changed at the right moments. On projects where clients are planning How to Plan a Kitchen Remodel While Living in Your Home, we align the ceiling phase with cabinet or countertop timelines so trades are not stepping on each other.
The small touches matter. We photograph vent registers and device covers so they go back exactly as they were. We label pendant locations before removing fixtures to maintain the original layout. On older homes where electrical boxes sit proud of the drywall due to the original texture thickness, we adjust box extenders so cover plates sit flush after the ceiling goes flat. These are not big-ticket items, but they keep the finish from feeling like a patchwork.
Paint choices that flatter a smooth ceiling
Finish level dictates sheen. A Level 5 finish, where the entire ceiling has a skim coat and you cannot see any banding under raking light, can handle a low-sheen eggshell and reward you with extra brightness. If the finish is Level 4 and the room gets hard side light from big windows, a true flat is more forgiving. Ceiling-specific paints have more solids and a slightly higher viscosity, which helps hide roller marks and maintain uniformity. In kitchens and baths, a high-quality mildew-resistant formulation pays for itself, especially near shower lines and over cooktops.
Color deserves a quick word. Pure white is rarely the answer. A subtle warm or cool bias that ties to your trim and wall palette feels intentional. If you are updating several rooms as part of Whole House Painting: How to Plan Your Project, choose a ceiling white that stays consistent across spaces so you do not fight undertones where rooms meet.
The mess factor, handled properly
There is no such thing as a completely mess-free popcorn ceiling removal. The goal is controlled mess. A well-run job uses continuous floor protection, poly walls with zip door access, and dedicated routes in and out for debris. Wet scraping limits airborne particles, and dust-extracting sanders prevent that talc-like haze from settling. At the end, a HEPA vacuum and damp wipe finish turn the space back over in a condition where you are not discovering residue a week later on picture frames.
One cautionary note from past rescues: a homeowner used a garden sprayer and a drywall knife over a weekend and made progress, but the drywall paper began to delaminate in patches. Once the paper fibers lift, you need a sealing primer like an alkyd or shellac before skim coat, or the surface will bubble under water-based compound. That added two days to a project that could have finished earlier. Wet is good, but too much water for too long is not.
Integrating ceiling work with larger remodels
Ceiling work sits at the top of the sequence for a reason. If you are remodeling a kitchen, for example, remove the popcorn before you install new cabinets or Thinscape countertops. The process is wet and messy; you do not want compound dust on fresh cabinet paint or in new drawer slides. If you are timing a Complete Bathroom Remodel: Timeline and What to Expect, finish the ceiling and ventilation rough-in before tile. Electricians appreciate this too, since they can set boxes without fighting texture, and your Kitchen Island Design: Size, Style, and Functionality Tips conversation will include lighting layouts that behave as drawn.
If you are painting cabinets, as covered in Cabinet Painting vs. Staining: Which Is Better?, smooth ceilings make the sprayed cabinet finish look sharper by comparison. It is the frame around the art. When the ceiling is rough, you can paint everything else perfectly and still feel something is off.
A brief word on DIY vs. professional help
Plenty of hands-on homeowners can tackle a small room. A guest bedroom with thin, unpainted popcorn and no crown is the training ground. The project should include surface protection, a spray bottle, a wide drywall knife, patching compound, sanding, priming, and painting. Where DIY goes sideways is scale, heavy paint on the texture, and hidden issues like cracked seams or old repairs. Once you see loose joints telegraphing through or you find yourself sanding clouds of dust, the effort and risk often outweigh the savings.
The upside of hiring a team is not just speed. It is the set of small corrections layered into the process: re-screwing sagging drywall, tracking and fixing nail pops that only show up under raking light, capturing dust effectively, and cutting razor-straight paint lines that hold up under any lighting you install later.
Comparing end results to living with texture
A good test is before-and-after photography taken at the same time of day. Stand in the doorway and aim at the same corner. With popcorn, highlights and shadows create a stippled gradient that distracts the eye. After removal, lines around vents, speakers, and lights read clean. If you have open shelving in a kitchen, as discussed in The Pros and Cons of Open Shelving in Kitchen Design, a flat ceiling reduces visual noise so your display reads intentional rather than busy.
Maintenance shifts too. Smooth ceilings welcome quick touch-ups. If a water stain appears after a minor leak, you can address it with a stain-blocking primer and feathered paint. On textured surfaces, matching the exact peak profile is hard. After a patch, your eye finds the repair every time you enter the room.
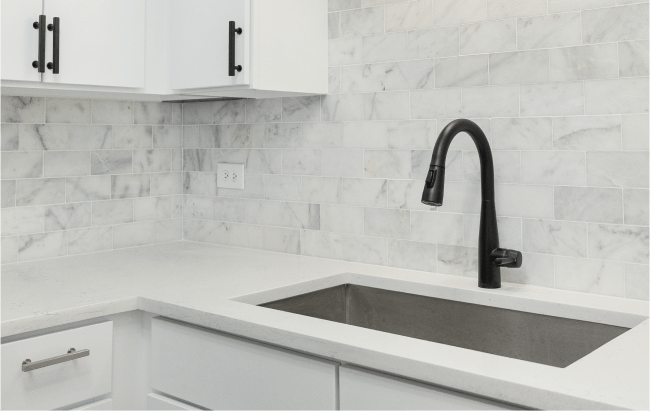
Common pitfalls, and how to avoid them
Three problems show up often. First, scraping painted popcorn without testing adhesion. If the paint resists water, you will gouge the paper, and the repair will balloon. Second, skipping primer after skim coating. Compound is porous; paint absorbed unevenly will flash and telegraph sanding lines. Third, forgetting about mechanicals. Recessed light trims and smoke detectors were mounted to a thicker surface. After removal, you may need trim rings or extender kits to make them sit flush and safe.
Surface lighting is another trap. Mount a bright, close-to-ceiling fixture over a mediocre finish and you highlight every trowel line. Plan the finish level to match the lighting you want, not the other way around. If you prefer crisp light, invest the time in a higher level of finish.
A vivid improvement with lasting value
Ceiling work feels intimidating because it touches every inch of a room. The payoff justifies the disruption. Rooms feel taller. Light performs better. Cleaning gets easier. Design options expand. You gain flexibility whether you are staging a sale or setting up a home you intend to keep. It is one of those projects where the before-and-after gap is bigger than the budget might suggest.
For our crew at Revive 360 Renovations, popcorn removal has become a springboard step in broader interiors projects. We see clients move from this upgrade into interior painting, cabinet refinishing, and strategic flooring changes because the ceiling sets a high bar that the rest of the space wants to meet. When the largest uninterrupted surface in your home looks refined, every other detail has the chance to shine.
A short homeowner prep list that makes the job smoother
- Clear tall furniture and wall art, or stage it in the center under protection. Identify any planned lighting or fan changes so box locations can be adjusted now. Replace HVAC filters after the job, even with HEPA capture in place. Plan a temporary cooking or work area if the kitchen is involved. Walk the space with the foreman under raking light before final paint to flag small touch-ups.
That last point matters. Raking light, whether from a window or a work light held close to the plane, reveals imperfections that are invisible under normal lighting. Catching them before the final coat elevates the result with minimal extra time.
Where popcorn removal fits among other interior upgrades
Think of it as infrastructure for aesthetics. It sits alongside drywall repair, wallpaper removal, and primer selection in your interior toolkit. If you are mapping a series of improvements over a year, pair popcorn removal with How to Prepare Your Home for Interior Painting. Tackle ceilings and walls together in zones, then move to trim and cabinets. If your floors need attention, decide whether you will refinish before or after ceiling work. Many crews, including ours, prefer to complete ceilings and walls first, then mask carefully and refinish floors with the home nearly dust-free.
For clients choosing The Best Paint Finishes for Each Room in Your Home, this ceiling decision simplifies the matrix. A flat or matte ceiling in living spaces, and a durable, washable low-sheen in kitchens and baths, becomes the default. Those choices hold up across styles and rarely need reconsideration once the ceiling is flat.
Final perspective from the field
I remember a 1969 ranch where every single room had heavily painted popcorn. The owners swore the rooms felt cramped, even though the house had decent square footage. After removal and fresh paint, they remarked that the hall felt wide for the first time. We did nothing to the hall. We only took the fuzz off the ceiling and tightened the paint lines. Perception drives satisfaction in a home, and ceilings carry more of that weight than people realize.
If your home’s to-do list feels long, popcorn ceiling removal is a surprisingly strategic early move. It clears the visual deck. It makes every other dollar you spend on lighting, color, tile, cabinets, or furniture work harder. And when done with care, it is a one-time upgrade that stays out of your way for years, doing exactly what a ceiling should do: reflect light, disappear from attention, and quietly make everything beneath it look better.